How to configure your iPhone or iPad for email with Indra’s Net
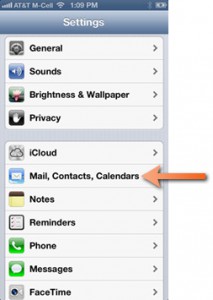
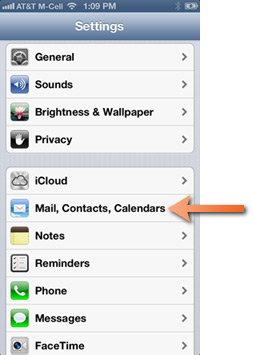
- From your home screen, go to Settings

- Select Mail, Contacts, Calendars
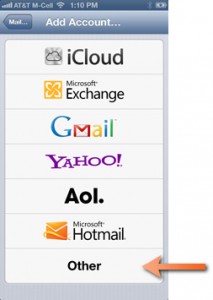
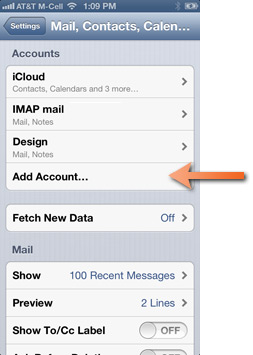
- Select Add Account

- Select Other
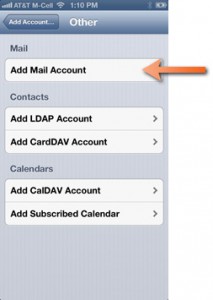
- Select Add Mail Account
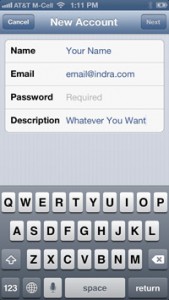
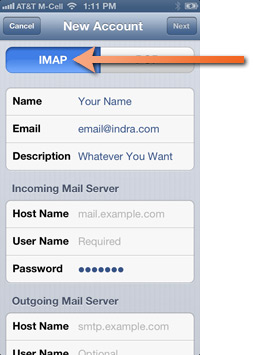
- Fill in the displayed fields with your information
- Make sure that IMAP is selected at the top of the screen
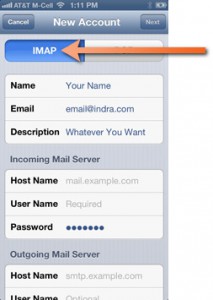
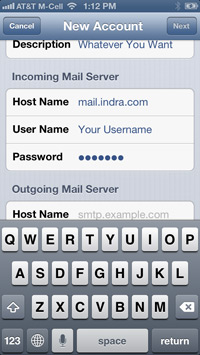
- In the incoming mail server section, enter mail.indra.com, your username, and your password
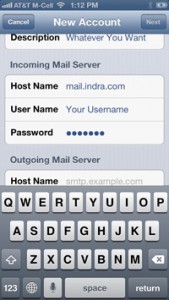
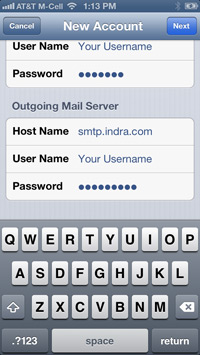
- In the outgoing mail server section, enter smtp.indra.com, your username, and your password


Advanced Settings
Other settings that might need to be tweaked – sometimes you have to go into advanced settings, make sure SSL is on and Authentication is set to Password, server port should be 993.
In the Outgoing Mail Server settings, make sure smtp.indra.com is the primary server, check that username/password are entered, SSL is on, Authentication is set to password, and server port is 465.
If the customer’s sent folder is getting full from sending lots of pictures from their phone, they should go into Advanced, Select Sent Mailbox under Mailbox Behaviors, and change it to store sent messages on their iphone instead of on the server.
All of these settings can be found in the “Advanced” section, which can be found by going into your Settings, selecting “Mail, Contacts, Calendars”, selecting the account you wish to edit, selecting the account on the following screeen, and selecting “Advanced” at the bottom of the screen.